Speed up your production
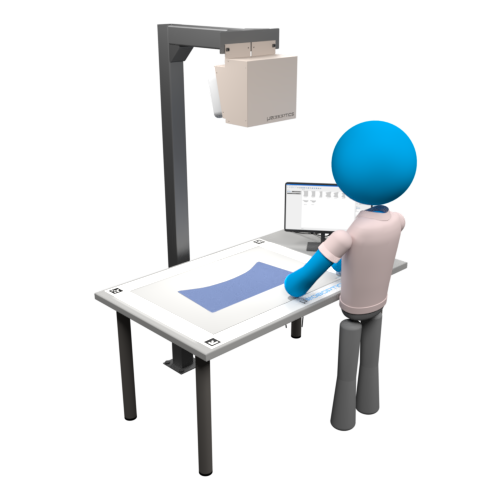
µInspector is the ideal solution for footwear, apparel, automotive, upholstery, and leather goods in the areas of assembly, quality control, and modelling.
With µInspector, the user has access to an extensive set of tools aimed at optimizing production processes both interactive and fully automated.
µInspector is flexible for use in any production and can be easily adapted to any workflow.
- Available in multiple sizes to fit your production;
- Low workflow and production disruption with a minimal setup;
- Use as a workstation, table top, or simply setup over your work surfaces.
Features
Interactive placing
Some production lines require assembly of multiple parts over one another (bathing suits, shirts). Correctly placing these parts is a laborious, time consuming and prone to human error task.
Legacy methods require an operator to take multiple measurements and use molds.
µInspector’s Metric Pattern Showing System (MP2S) can instantaneously display all assembly steps. No more measurements from the operator when assembling.
Key benefits:
- Save time;
- Reduce errors by preventing human error regardless of skill and effort.
Interactive quality control
Quality control is a necessary step in any production line. Designed to be used with more irregular shapes, the interactive dimensional control allows to quickly place the part in the shown pattern and identify part compliance.
Legacy methods require printing every part in production to later compare against the production parts, which is laborious and time consuming. Part inspection is often made by manually overlapping both parts and measure the differences.
µInspector’s Model Importer (MI) eliminates the need to print any part since external geometry files representing model parts can be imported and displayed with the specified validation margins.
Automatic quality control
Most methods allows for only one part to be inspected at a time.
µInspector’s Automatic Imaging Validation (AIV) accelerates quality control even further by inspecting multiple parts at once with a single click. Using a high resolution camera system, ensures part dimensions within 1 millimetre.
Key benefits:
- Improve speed by inspecting multiple parts simultaneously;
- Easy to interpret immediate compliance report.
Virtual measurements
Measuring parts is a necessary task throughout the process of apparel design, production, and quality control.
µInspector’s Template-based Imaging Ruler (TIR) enables taking measurements over a working surface according to your specified template on multiple parts at a time.
Key benefits:
- Both interactive and automatic measuring tools available;
- Multiple measurements in one click;
- Faster to use than regular measuring tape.
Automatic identification
Identifying the correct pattern from a database of hundreds or thousands of different parts is challenging, error prone, and time consuming.
µInspector’s Imaging Part Recognition and Positioning (IPRP) speeds up production throughput by quickly recognizing the right pattern and placing it over the part.
Key benefits:
- Quickly identify even similar parts within a database.
Automatic tracing
Factories often must find a solution for vectorizing patterns received from clients, creating a digital file from the client’s physical sketch.
µInspector’s Imaging Part Tracing (IPT) automates this process by performing geometry vectorization with a single click. Vectorized parts can then be exported in standard CAD formats for further processing.
Key benefits:
- Instantaneously trace full parts;
- Easy to export for further processing.
Nesting BETA
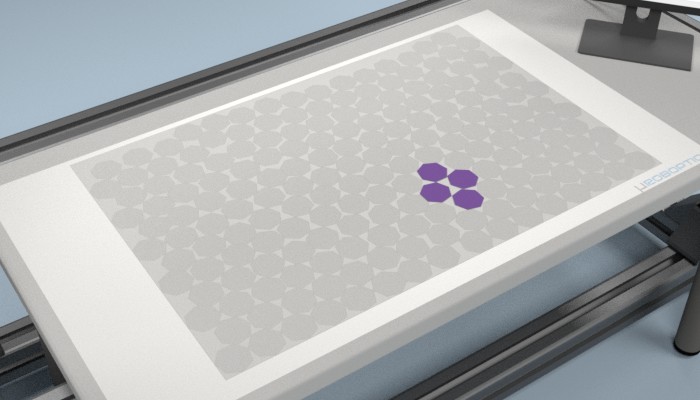
The process of organizing shapes into cutting planes is a laborious and time consuming process. Automating this process leads to reduction in preparation time, material waste and overall operational costs.
µInspector’s Automatic Shape Nesting (ASN) optimizes cutting patterns, lowering the amount of scrap material. An intuitive interface makes it easy to select part quantities, sheet sizes and part rotation.
Key benefits:
- Increase productivity;
- Reduce material costs;
- Automatically place shapes in the specified amount and orientation;
- DXF exporting.
Video
Software
Licenses specific to your needs
µInspector’s software can be licensed into different tool packages:
| Features | Licensing | |||
|---|---|---|---|---|
| Basic | Modeling | Advanced | Full | |
| – Interactive projector calibration – Automatic camera calibration – Model import from DXF, GBR, and IBA files – DXF export – Layer visualization – Shrinkage support (warp and weft) – Multi projector support (1) – Access control for settings – Interactive placing – Interactive virtual measurements |  |
 |
 |
 |
| – Interactive quality control |  |
 |
 |
|
| – Automatic quality control (2) |  |
 |
 |
|
| – Automatic virtual measurements |  |
 |
 |
|
| – Automatic identification |  |
 |
||
| – Automatic tracing |  |
 |
||
Hardware
Capture and projection solutions
Capture, projection and background equipment are key components for any vision based system. µInspector’s hardware allows operation with materials of all colors and under a wide range of lighting settings.
This technology significantly improves contrast, reduces shadows and does not require light covers or controlled illumination.
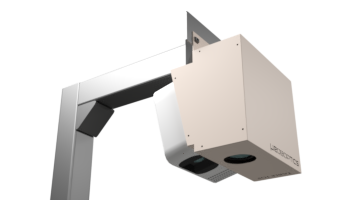
- The tabletop system is installed above the workplace and provides capture and projection capabilities required by µInspector. Available in three models, this system meets the requirements of most applications;
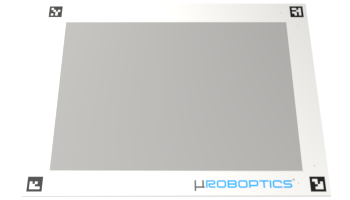
- Specifically tailored for µInspector, the base surface can be installed on your production table to enable automatic calibration features and provide the high-contrast required for more accurate capture and shape detection;
- Both tabletop and base surface are recommended for the best experience with the µInspector’s software.
A high performance desktop computer ensures a smooth workflow, boosts automatic nesting results and provides the best user experience.
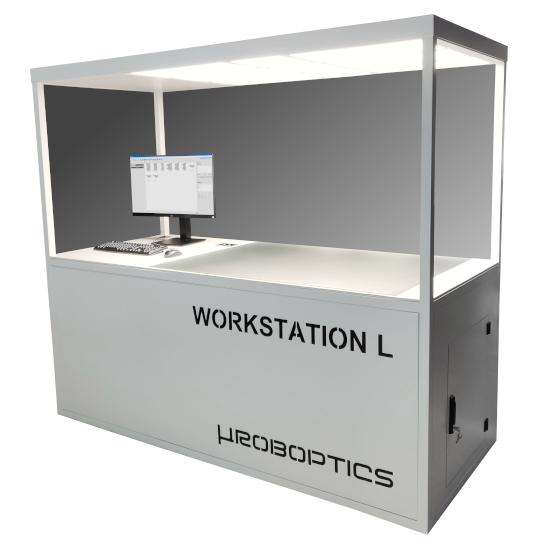
High-end solution for complex inspections
µInspector’s workstation offers a complete solution for the inspection of complex parts with multiple colors, reflective patterns and greater thickness without any loss in accuracy.
With µInspector’s Contact Shape Detection (CSD) technology, only the outline shape of each part is captured, regardless of thickness or texture. The workstation was meticulously designed to ensure that all captures are performed under optimal conditions in any environment.
This solution includes:
- Complete workstation with all equipment installed;
- Light fixtures for an uniform illumination to the operator and the capturing system;
- High resolution camera fixed inside the workstation.
Available hardware solutions
Each solution has the following equipment and specifications:
| Equipment | Tabletop + Base | Workstation | ||||
|---|---|---|---|---|---|---|
| Industrial | Precision | Precision Plus | Industrial | Precision | Precision Plus | |
|
– High-contrast surface ○ Shadow removal ○ Robust to external lighting ○ Capture materials with any color ○ Contour capture (1) ○ Texture capture (1) |
 |
 |
 |
|||
|
– Improved capture system ○ Shadow removal ○ Robust to external lighting ○ Capture materials with any color ○ Capture materials with greater thickness |
 |
 |
 |
|||
| – Available workspace sizes (2) | L: 1100×700 mm XL: 1400×900 mm |
L: 1100×700 mm XL: 1400×900 mm |
L: 1100×700 mm XL: 1400×900 mm |
L: 1100×700 mm |
L: 1100×700 mm |
L: 1100×700 mm |
| – High resolution camera |  (from Infaimon) |
 |
 |
 (from Infaimon) |
 |
 |
| – Industrial camera | ||||||
| – Capture resolution | L: > 0.40 mm XL: > 0.50 mm |
L: > 0.40 mm XL: > 0.50 mm |
L: > 0.25 mm XL: > 0.32 mm |
L: > 0.40 mm |
L: > 0.40 mm |
L: > 0.25 mm |
| – Full HD projector |  |
 |
 |
|||
| – Fixation structure | Optional | Optional | Optional | |||
| – High performance desktop computer | Optional | Optional | Optional | Optional | Optional | Optional |
| – Complete workstation |  |
 |
 |
|||
(2) Contact us for a custom sizing.
Get in touch
Looking for the right software and hardware combination? Need customized modules to meet your requirements? General inquiries?
Let us know at:


